Guide to getting started with ZivaCare API
The process has 3 simple steps
- Create a ZivaCare API app in our developer portal
- Register and authenticate a user from within your app
- Use a unique token to query their data directly from ZivaCare API
Let’s step though how to do this for the first time:
Step 1: Create a ZivaCare API app
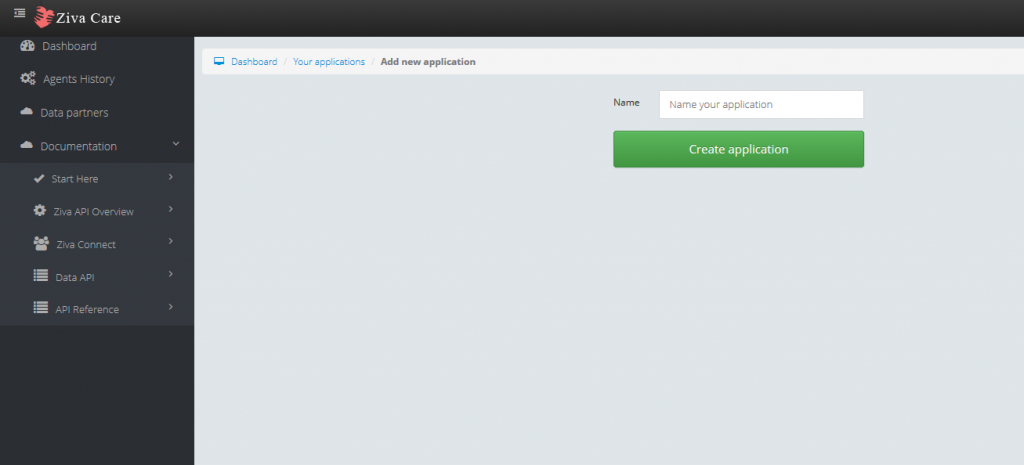
The first thing you’ll want to do, once you’ve signed up, is create a ZivaCare API application. An application in ZivaCare API holds all of your users and their various data that is pulled from any source they authenticate. It is the single pipeline that you will integrate directly with your application.
When you create a ZivaCare API application you’ll need to provide a name for your application, but don’t worry you can change this later.

Step 2: Authenticate your first user
Once you create your application you can configure settings. Now it’s time to set up the authentication flow and authenticate your first user.
A user authenticates ZivaCare API by clicking the CONNECT Health Data button and authenticating their data directly with your application. Go ahead and try it now:
You can easily emebed this authentication process directly into your application. To embed the authentication process into a web portal just copy and paste this code into your application:
<link rel="stylesheet" href="https://maxcdn.bootstrapcdn.com/bootstrap/3.2.0/css/bootstrap.min.css"><script src='https://code.jquery.com/jquery-1.11.1.min.js'></script><script src='https://developer.zivacare.com/connect.js'></script><button class='btn btn-small btn-info' id='connect-health-data-btn'> <img alt="" src="https://developer.zivacare.com/bundles/zivacareadmin/images/logo_icon.png"> <strong>CONNECT</strong> HEALTH DATA </button><script> var connectBtn = document.getElementById('connect-health-data-btn'); connectBtn.addEventListener('click', function (e) { var opts = { // Grab this from the app settings page. clientId: 'UNIQUE_CLIENT_ID_FOR_THE_APPLICATION', // Can be e-mail (any other internal ID of the user, from your system). clientUserId: 'UNIQUE_USER_ID_IN_YOUR_APPLICATION', finish: function(err, responseObject) { // When the user finishes the health data connection to your app, the `finish` function will be called. // `responseObject` object will have a specialToken field in it. // You need to pass this `specialToken` back to us, along with `CLIENT_SECRET` // Send a `POST` request to the `https://developer.zivacare.com/oauth/v2/get-access-token` endpoint. // In return you will get `accessToken` for your user, which can be used to query ZivaCare API. // Sending POST request with jQuery might look like this. // NOTE: it's not necessary to use jQuery. var data = { // Grab this from the app settings page. clientSecret: 'CLIENT_SECRET', specialToken: responseObject.specialToken }; $.ajax({ type: 'POST', contentType: 'application/x-www-form-urlencoded', dataType: 'json', url: 'https://developer.zivacare.com/oauth/v2/get-access-token', data: data, success: function(data) { // The response is a JSON with this structure: /* { "ziva_user_code": "xxxxxxxx-xxxx-xxxx-xxxx-xxxxxxxxxxxx", "name": "xxxxxxxxxxxxxxx...", "email": "xxxxxxxxxxxxxxx...", "access_token": "xxxxxxxxxxxxxxx..." } */ window.console && console.log(data); alert('The aceess token for your user is: ' + data.access_token); }, error: function() { window.console && console.log('Error getting the access token.'); } }); }, close: function() { // Do something when the user closed popup. // The `close` callback function is optional. } }; ZivaConnect.open(opts); }); </script>
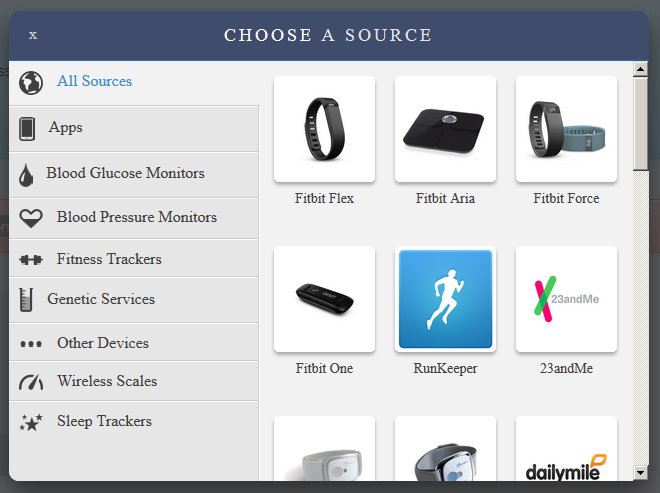
The ZivaCare Connect popup that the connect health data button launches allows a user to easily select and connect their health data to your application. When a user clicks the connect health data button your application will preregister them on our system (so we can generate an indentity for them). We cover how to do this in detail here. Once you pre-register them, they will see an authentication popup that looks something like this:

Step 3: Query a user’s health data
Once a user or patient has completed the authentication process and granted your application access to their health data, we will send you an access token.
This token is unique to your application and user, and it should be used to query the API to access that individual’s data.
An example access_token looks something like this:
OWZkNDMzMDZhNGQ2YzJmNWY3NzQ4Nzk0MzY4YjgyNGQ4MDExODZhZWMzYjJjY2I5NjFjYTlkODZiNWVhMDAxYQ
You can then use this unique token to query the API for a user’s data. For example:
https://api.zivacare.com/v2/human/bmis?access_token=OWZkNDMzMDZhNGQ2YzJmNWY3NzQ4Nzk0MzY4YjgyNGQ4MDExODZhZWMzYjJjY2I5NjFjYTlkODZiNWVhMDAxYQ
Did you know? To start using demo data, for testing purposes, you can just use the “demo” token with any query. This lets you get started right away. Click here to try it now with an example query.
Once you have a unique access_token you can query any endpoint a user has enabled. You can view a full list of queries here. That’s all there to it! Using ZivaCare API to authenticate users and query their data is very simple.